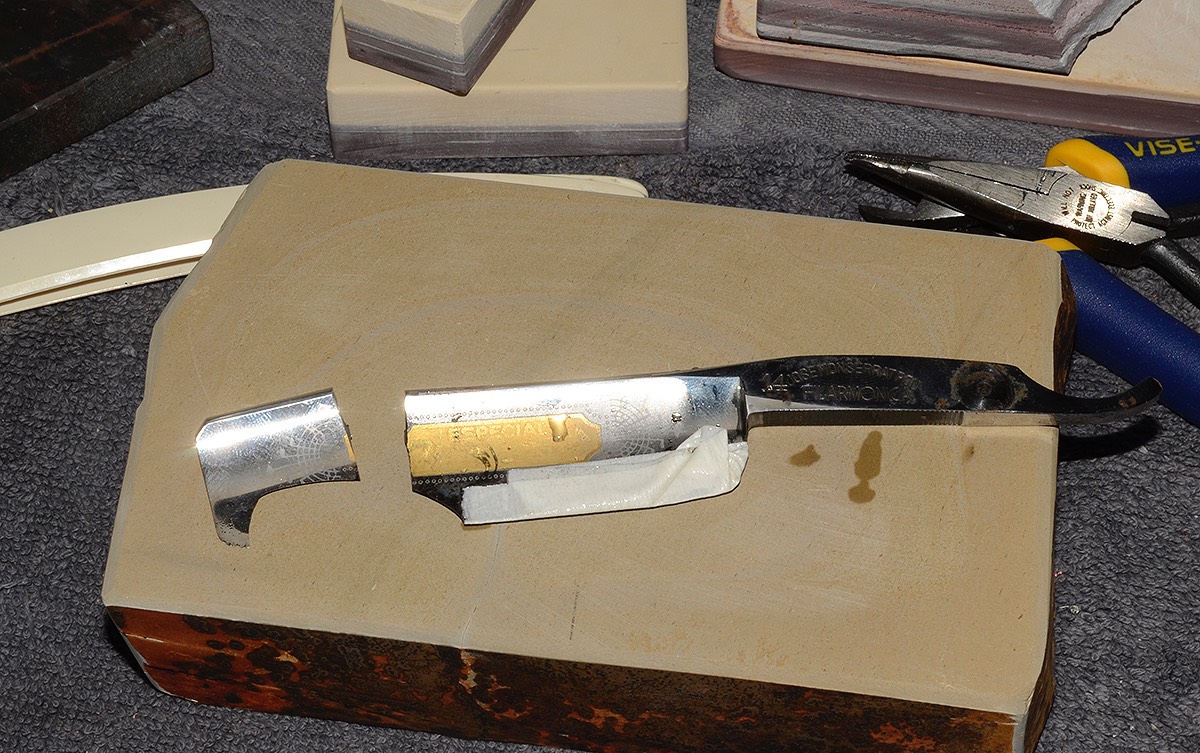
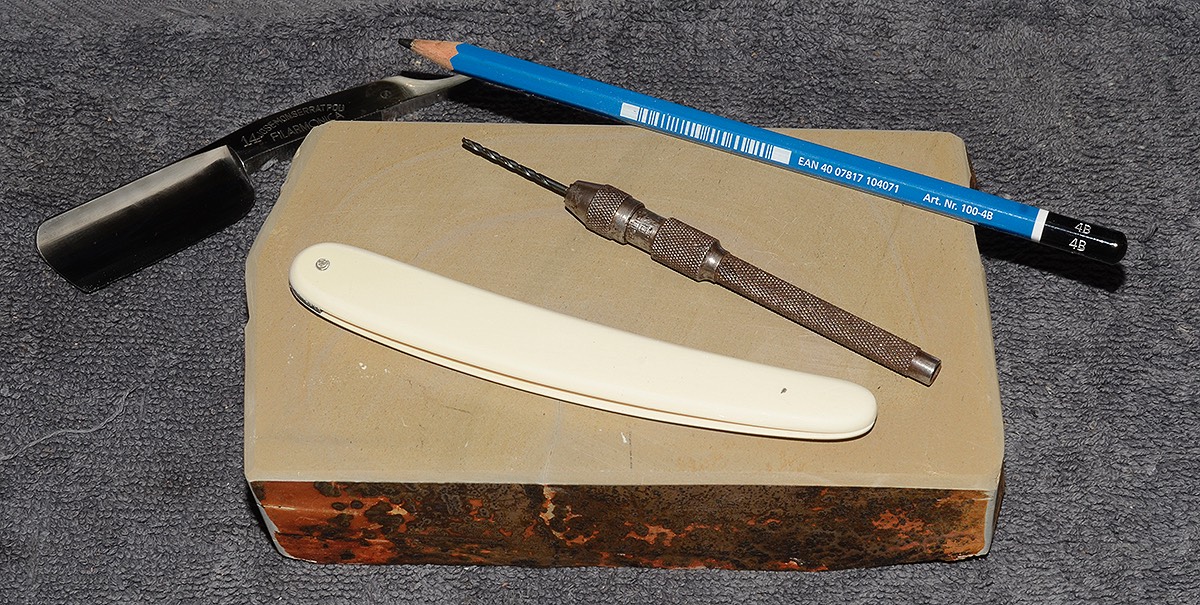
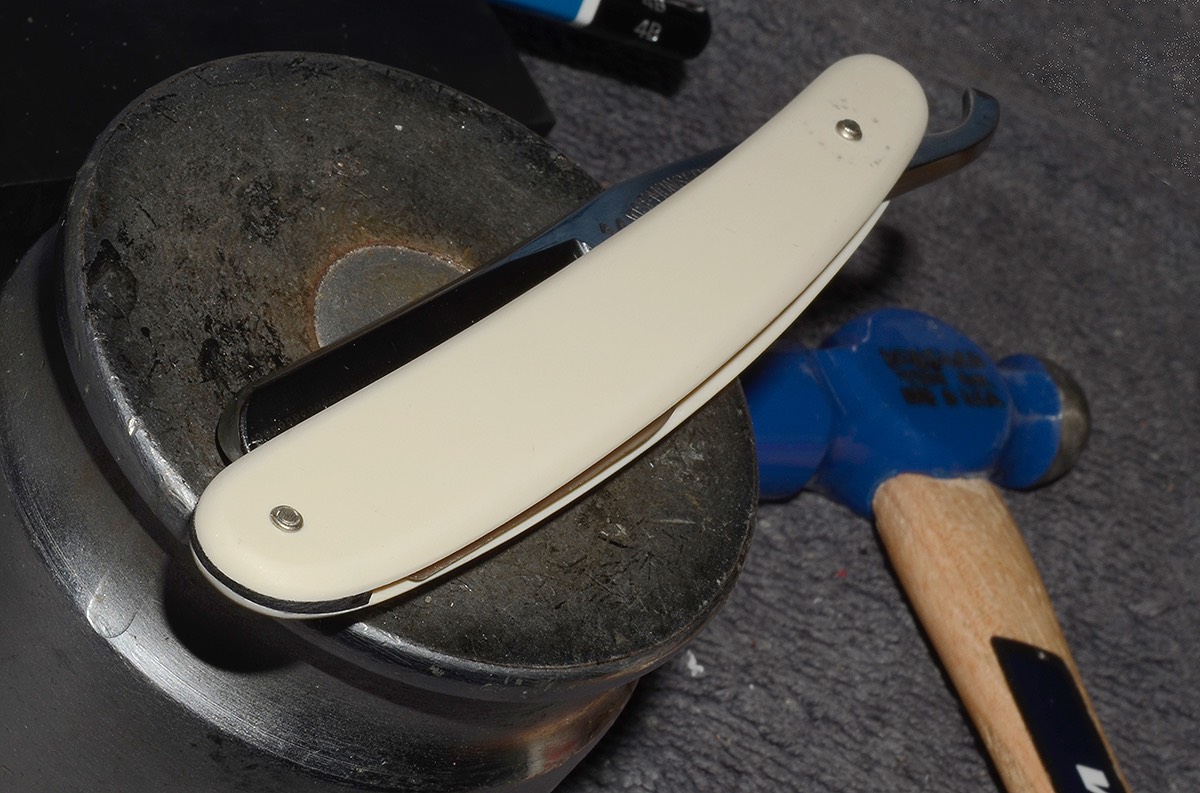
Step 1 - Find a damaged Filly. Easier said than done but I scored one.
2 - Mask off the part of the blade that is ‘good’ - and get ready to cut off the part that is ‘bad’. Get out the dremel, a cutting disc, and a mason jar of ice water to keep the steel cool. Dremels can blow the temper on a razor so fast it’s not funny - so the ice water is a critical component here.
3 - The cutting is done. I have some grinding/shaping to do though. I’ll have to be mindful of the thin-ness of the grind, and my approach on the wheel can only be from the spine to the toe, against the rotation of the wheel. And - going slow is imperative, as is the jar of ice water to keep the steel chilled.
4 - I used a 6” grinding wheel, medium fine grit, to shape the toe- dunking the blade in ice water every few seconds kept the temper safe. I used a sharpie to outline a barber’s notch and a round nose. But I wound up going for a totally different profile.
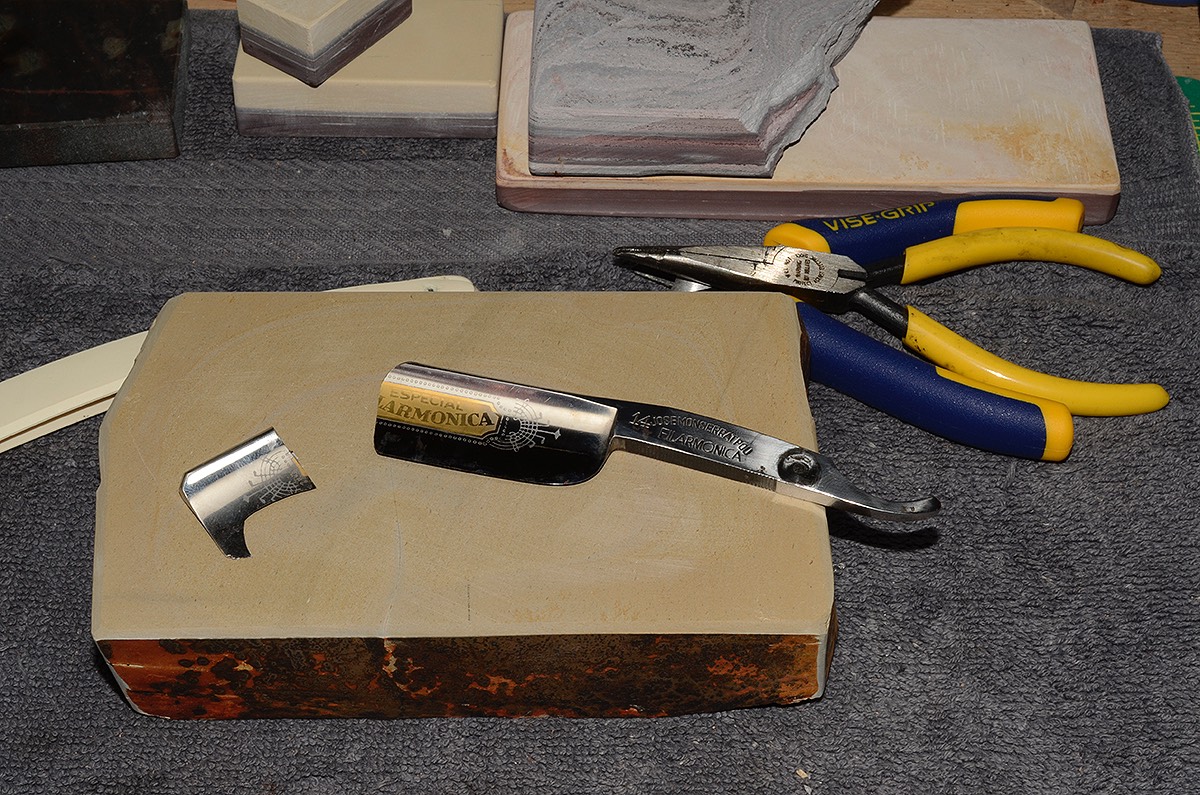
5 - Final shaping and polishing the toe was done by hand using w/d paper.

6 - I wanted to save the original scales - so they had to be cut down a bit. But, my preference for this restoration ws to make the distance from the pivot hole to the very end to be a bit longer than usual - the extra room for my thumb gives me a bit more control.
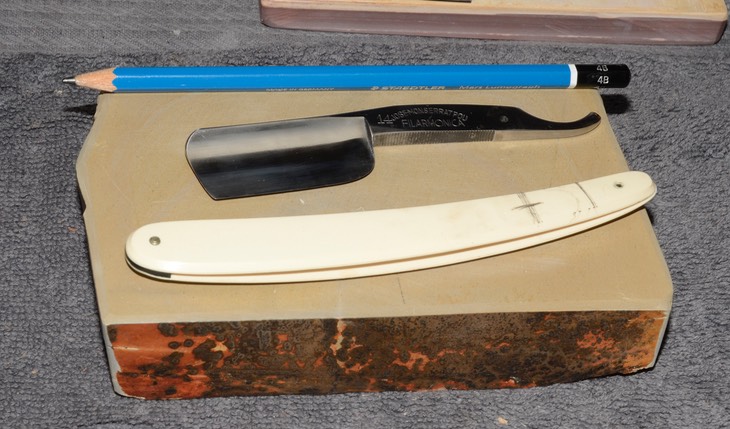
7 - These scales are a bit ‘soft’ - so cutting them back with flush cutters worked fine. Harder scales would have shattered though. I”m going to use the ears later on, so I’ll save them on the side.
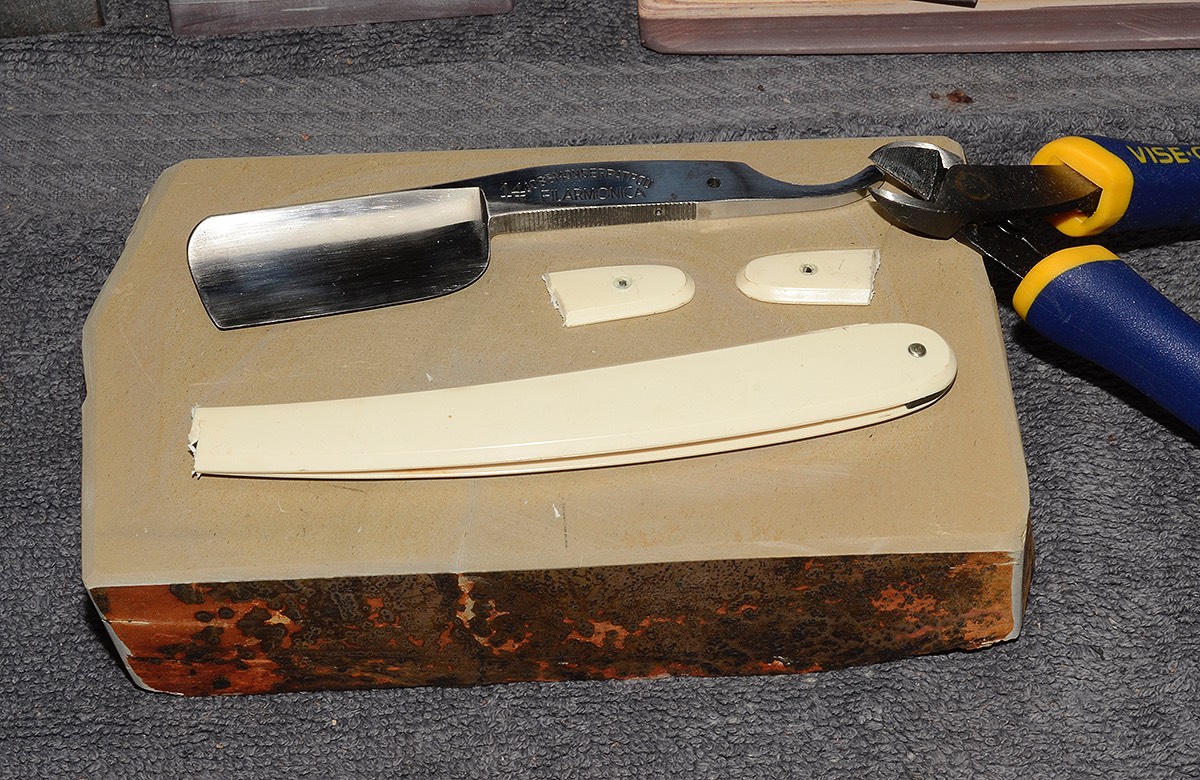
8 - After sanding re-shaping the cut end, and sanding down the rest of the scales - it’s time to drill the hold for the pivot pin. A pin vise is cheap, and extremely effective for this task.
9 - With the hole drilled, now we pin it. First - put the pin in. I use pivot washers on the inside to keep the scales from wearing out.
10 - The black stuff is panel tape , it’ll hold the blade in place while I’m pieening the pin down. You can see the washer is set on top of the pin. I’m using an inexpensive Dovo pin here - so I only have to do one side. I do make my own pins from NiAg and brass rod - but I also use this quick-fix pins often. I’m not fussy, and I like using them.
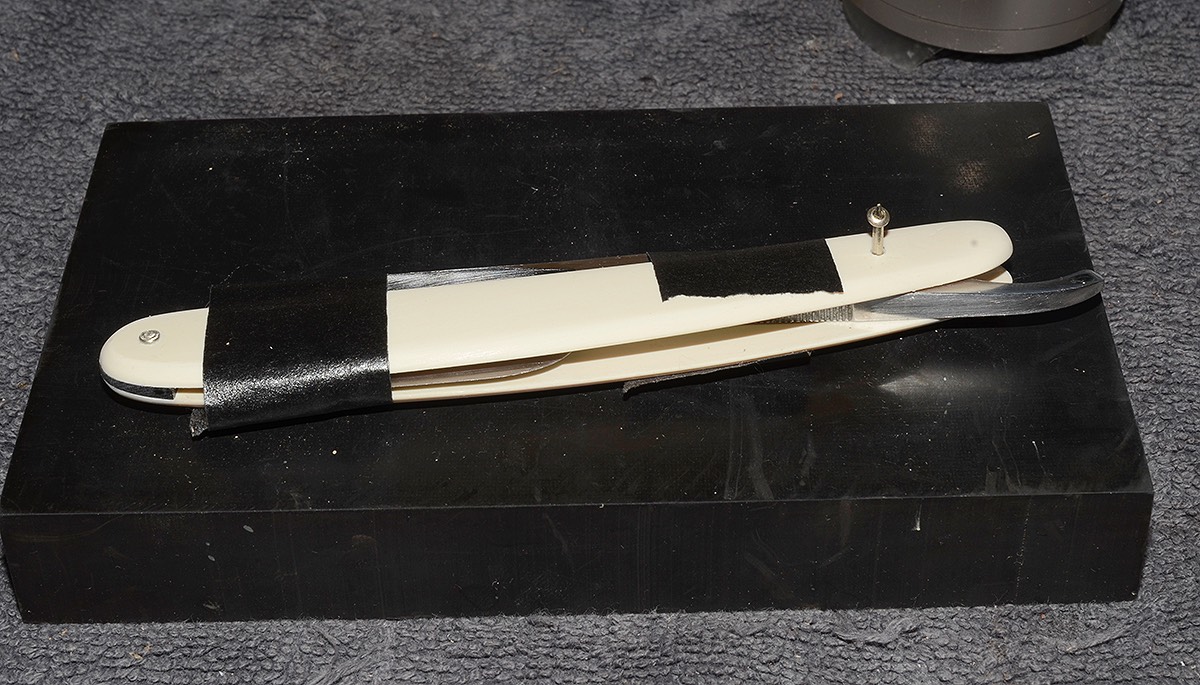
11 - I use flush cutters to nip the excess pin off. Then I file the pin down a bit so the peening work is done on a relatively flat surface.

12 - Then we tap, gently, but firmly, until the pin mushrooms over. Then we tap some more to get the pin to create enough tension so the blade is ‘comfortably snug’. I should be using tape around the pivot-pin area - but if I’m careful I won’t mar the scales.
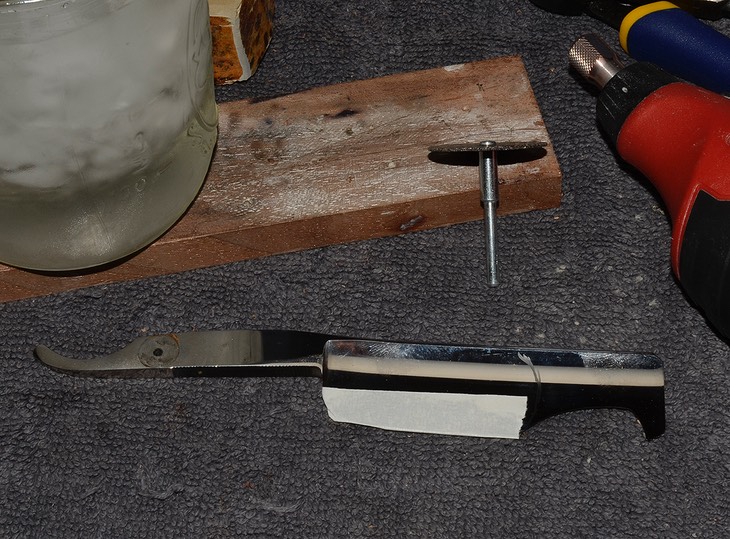
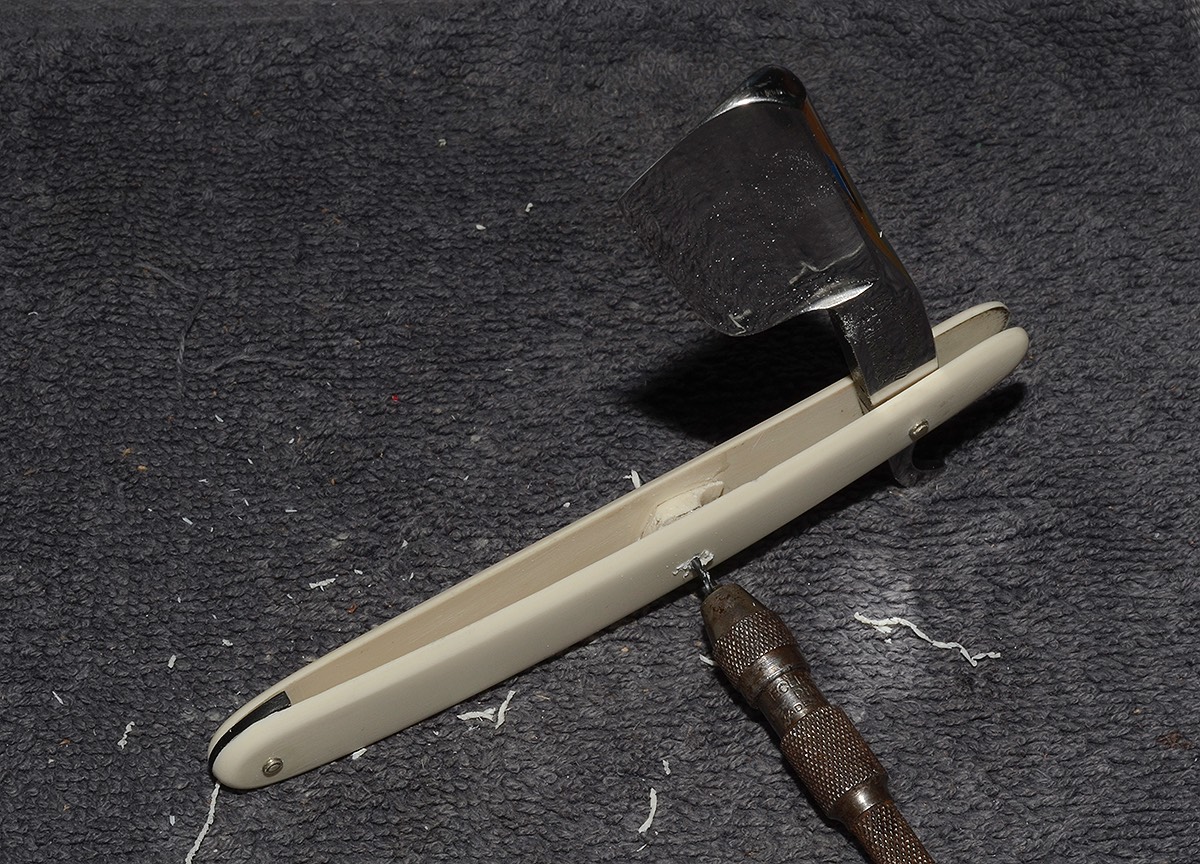
13 - Small problem. But not an unforseen one.
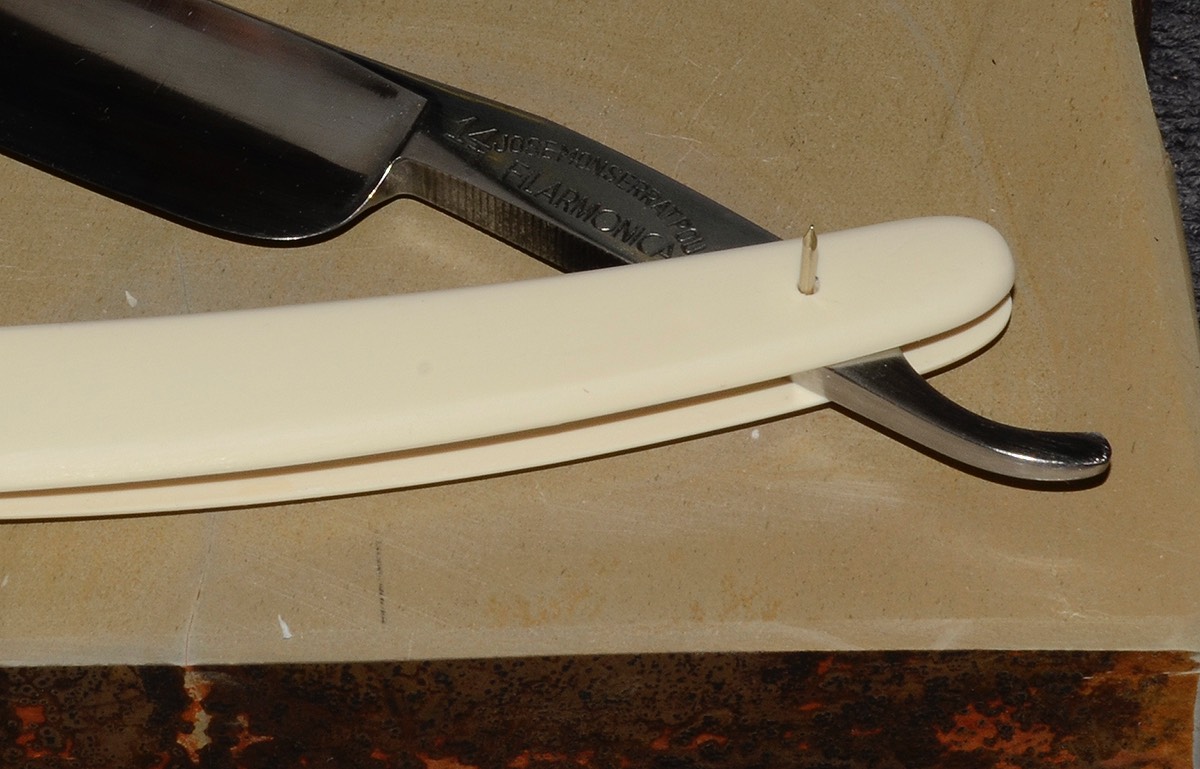
IN the pic below you can see the blade is poking out of the bottom of the scales.
How did that happen? Well - the scales don’t fit ‘perfectly’ - the gap at the toe is too wide and, as a result, the razor is sitting too low.
Now - I could pull the wedge, fiddle with all of it to bring the scales closer together.
Thing is - I want the blade to sit in a svery specific spot, so the curve of the spine follows the curve in the scales nicely.
So - I need a plan. Well -actually - I had a plan. I saw this issue developing when I was fitting up the scales earlier.
Remember the leftover ‘ears’ from when I trimmed the scales?
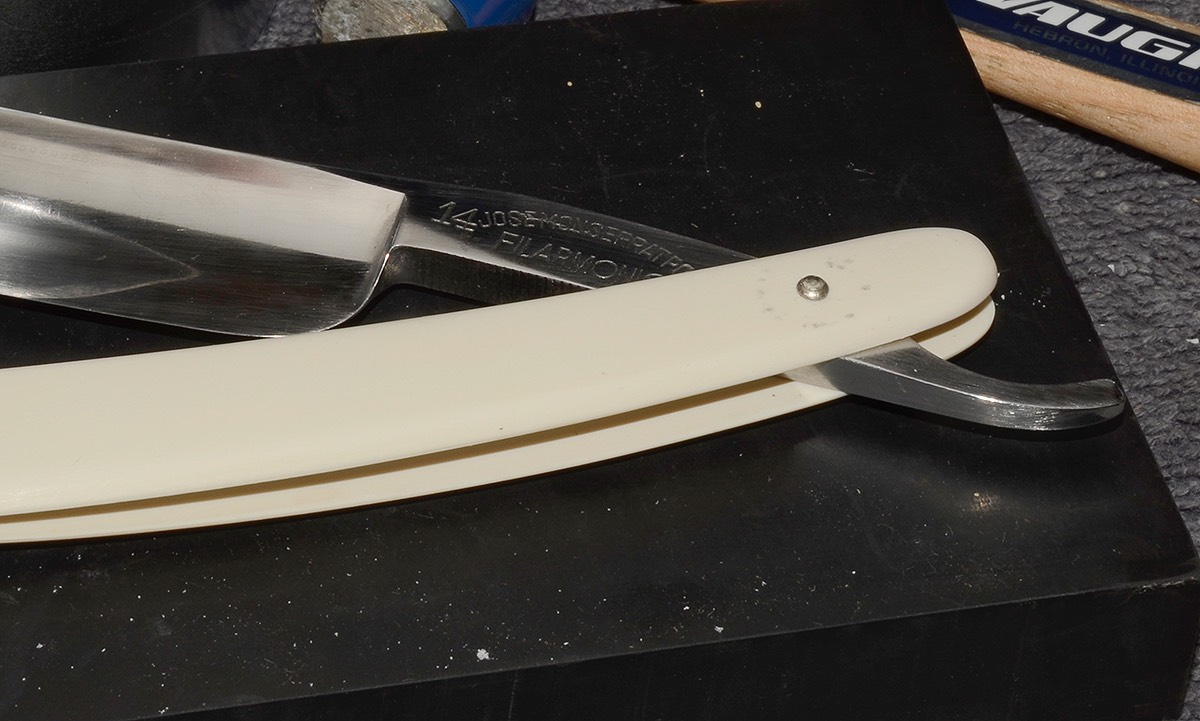
14 - I glued the ears together, and sanded them down to make a small ‘block’ of plastic that fit between teh scales. I positioned one flat side up against the tang, and then drilled and pinned it into place. A little CA glue helped keep it in place while drilling. The tang did not clear the newly added support, so Ifiled a channel nto it; like a groove that let the blade flip through the scales.
Yep - that’s the pin vise at work.
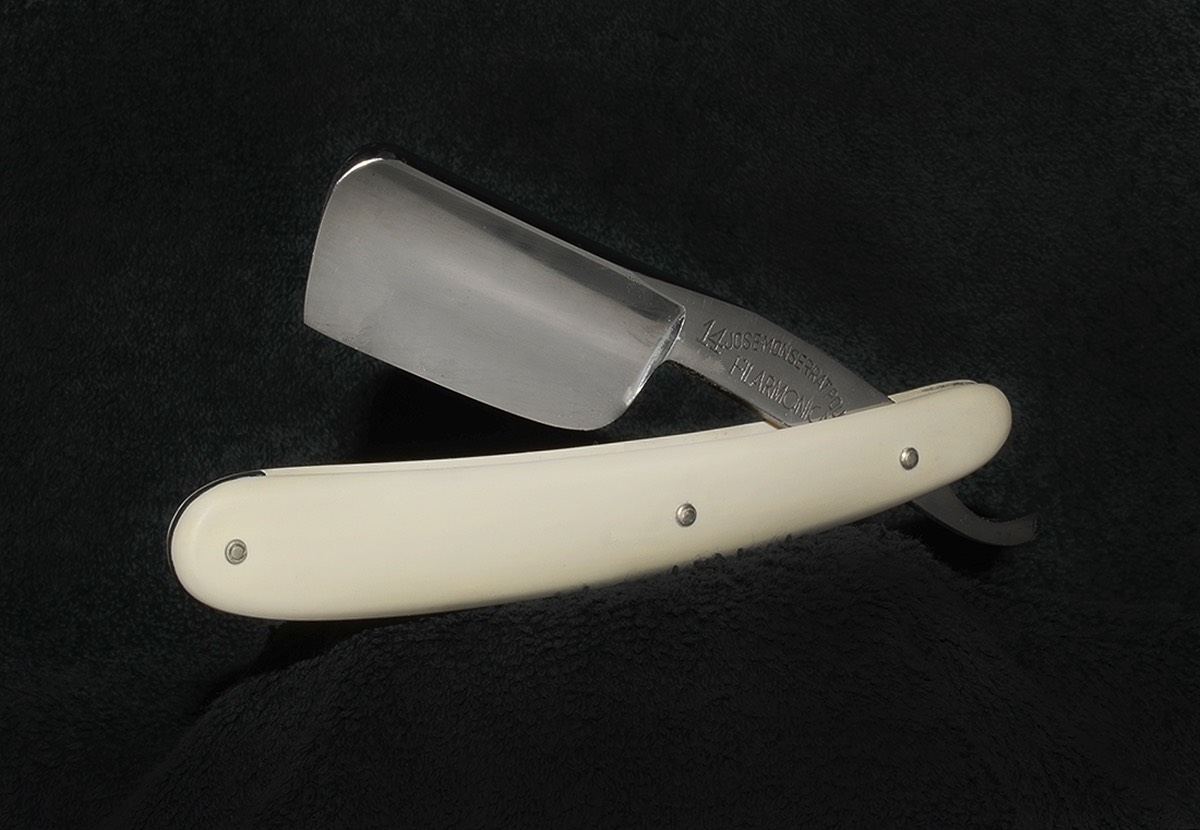
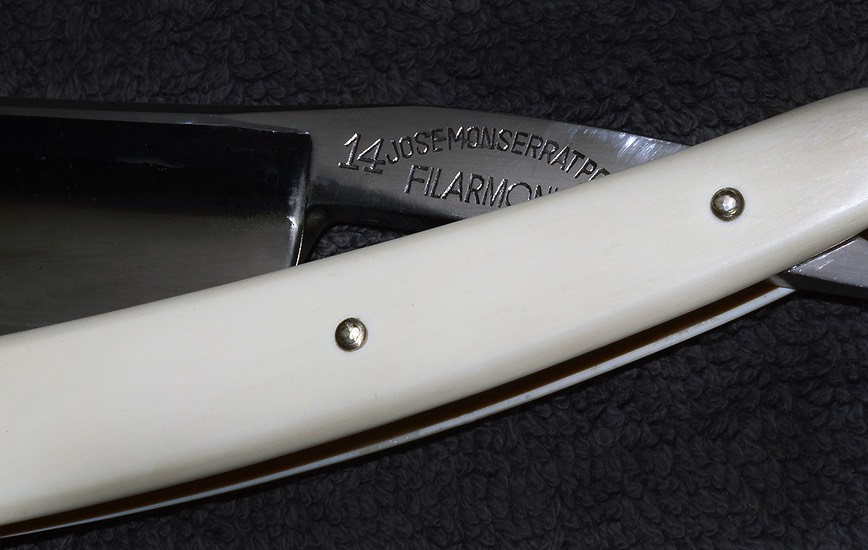
15 - After that was done - it was time to set the bevel on the 1k Chosera. This razor was NOS - never honed, never even had a factory bevel. So - even though the grind is super-thin, I had a lot of work to do. As a result, the spine is going to show some wear, not a lot, just some.
Where the edge would have been, from heel to toe, the steel was rotted and full of micro-pitting. I’ll need to take off some steel… I could tape the spine, but I am planning on taking this razor when I travel - and I really don’t want to have to deal with taping the spine when I’m on vacation. And yes - not using tape means I’ll gain about 1˚ of angle on the bevel over one from a taped-spine. That means the angle will be steeper and the EW will be thinner too. Way I see it - a little spine wear is a small p;rice to pay here.
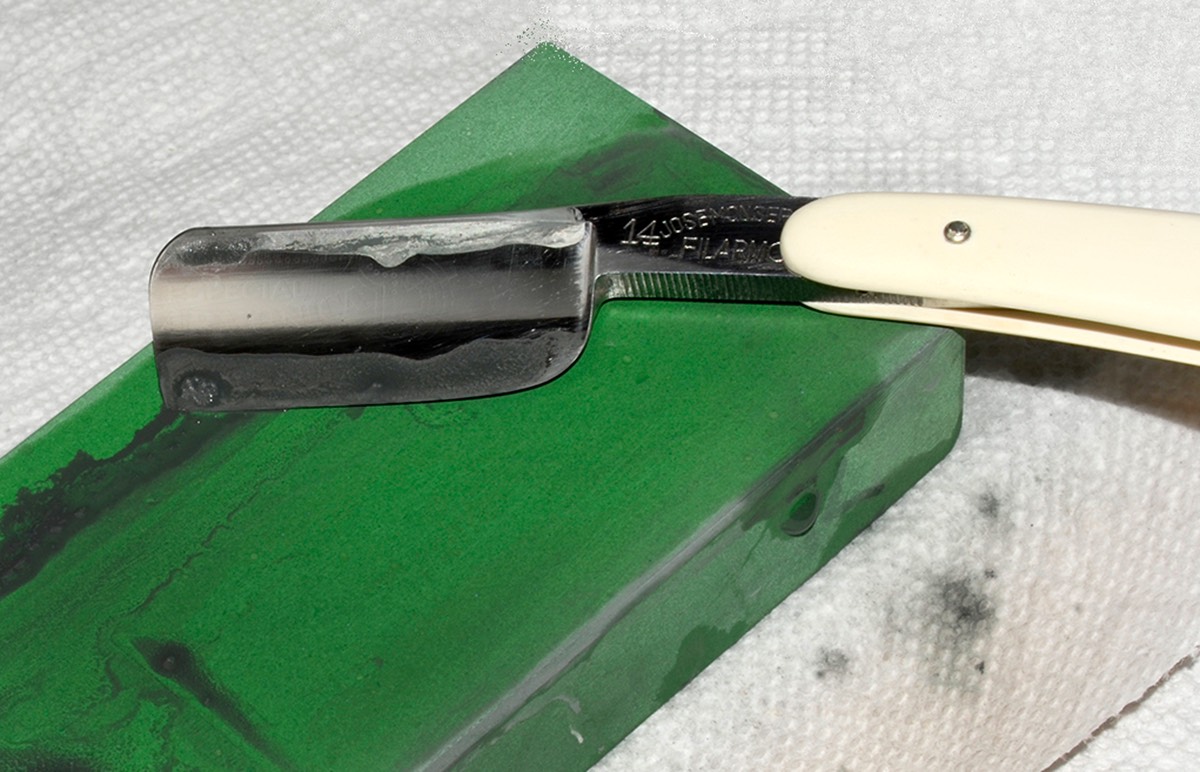
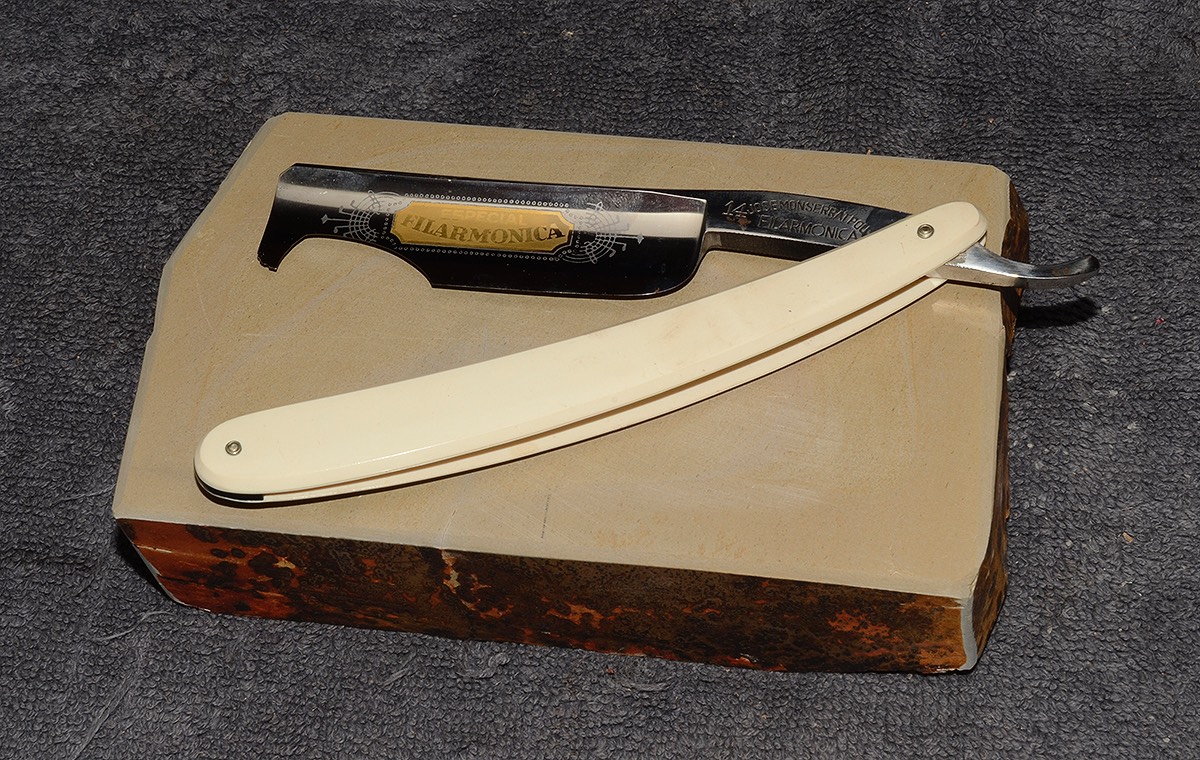
16 - So - after a bevel-set and a full Jnat progression, we’re ready to shave.
What was, originally, a ‘hopeless’ basket-case, turned out to be the Belle of the Ball.